Chicken Rice Bowl

Love my Instapot! Makes cooking so fast and easy, not to mention tasty! Today I went with a chicken and rice taco bowl. If you wrap this in a tortilla it would be just like Chipolte!! This only needs to pressure cook for 8 minutes so makes for an any day meal.

Not too many ingredients for this one. And with the Instapot, it makes for easy clean-up:) Pretty much add everything to the pot and pressure cook for 8 minutes. Let it release naturally for 12 minutes and it is cooked.

Once it is done just pull out the chicken breast and pull apart. Add back to the pot, stir and it is time to eat. You can add lots of extras to the top of your bowl. Avocados, sour cream, cilantro…….

Cheers!

Posted in Uncategorized | Leave a comment

We are back!

It has been awhile since we have posted. Work, travel and life sometimes get in the way. But I needed to come back to post this amazing cheesecake I made yesterday! I have been traveling quite a bit for work and when I was in Brazil (over my birthday) my coworkers got me this Dulce de leche with coconut. I decided to make a cheesecake with it!

Since we are gluten free, I needed something for the crust. I found some GF snicker doodles from Wow baking company that I thought would work great. Crushed them up, added some melted butter and presto – crust.

I used 13.4 ounces, which is the same size as a typical can I get here.

After mixing up the base, I warmed the dulce de leche, dropped it by tablespoonfuls on top. Then swirled it in with a knife – starting to look good!

Baked it for about 80 minutes. The top was jiggly so it was done. Cheesecake is a bit tricky and you do not want to overcook or it will get dry. I let it cool for an hour before adding some toppings. I added some chocolate sauce then put in the fridge to chill for 12 hours.

The finishing touch was to mix hot water with more of the dulce de leche and spread on top. Man this was so good. Will be making this again. Cheers!

Posted in Uncategorized | Leave a comment

Beef Jerky – Jalapeno and Pineapple Chili

One of my all time favorite snacks is beef jerky! Whenever we go on a road trip, it is a must have. This past weekend I decided to fire up the Traeger and make some of my own. I used 2 types of meat – sirloin and bottom round – just to see if one would be better than the other. The 2 cuts were about the same price per pound so thought this would be a good comparison. I made a Jalapeno Jerky with the sirloin and a Pineapple Chili with the bottom round. (I used Thai Kitchens Pineapple and Chili sauce in the marinade)
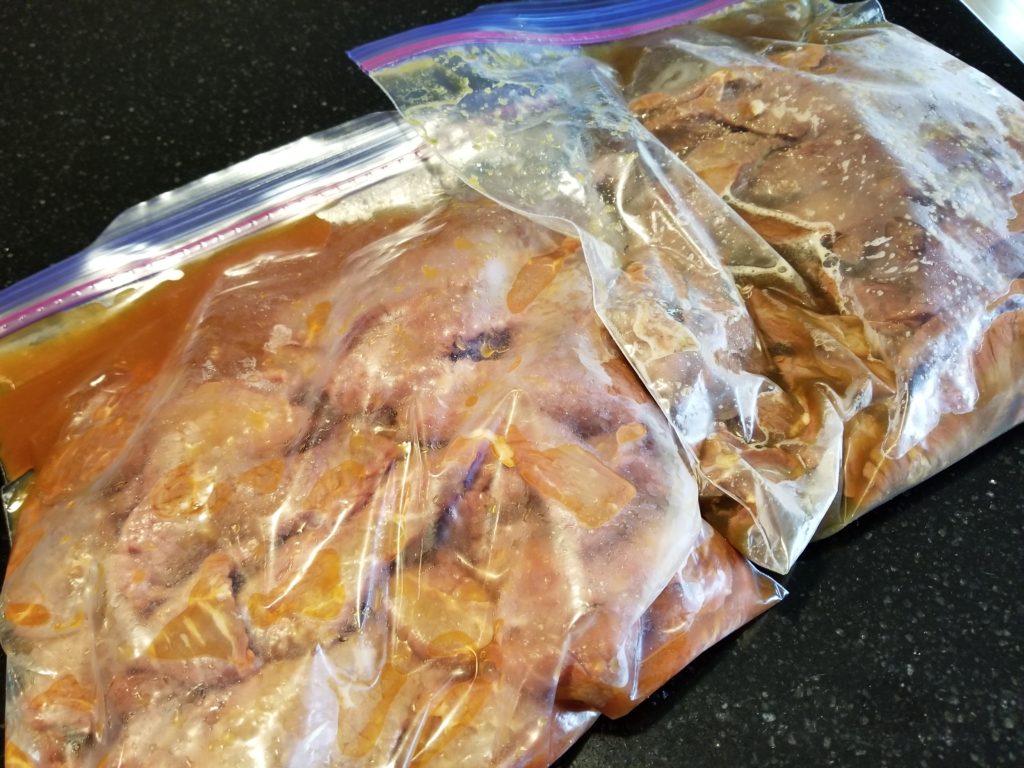
First step is to slice the meat into 1/4 inch strips. For easier slicing toss the meat in the freezer for 15-20 minutes. This was the hardest part of the process! I think next time I will have the butcher do this. Next put together the marinades. Place the meat in a bag and pour marinade over the top. You will want to put this in the fridge for at least 6 hours or overnight. 
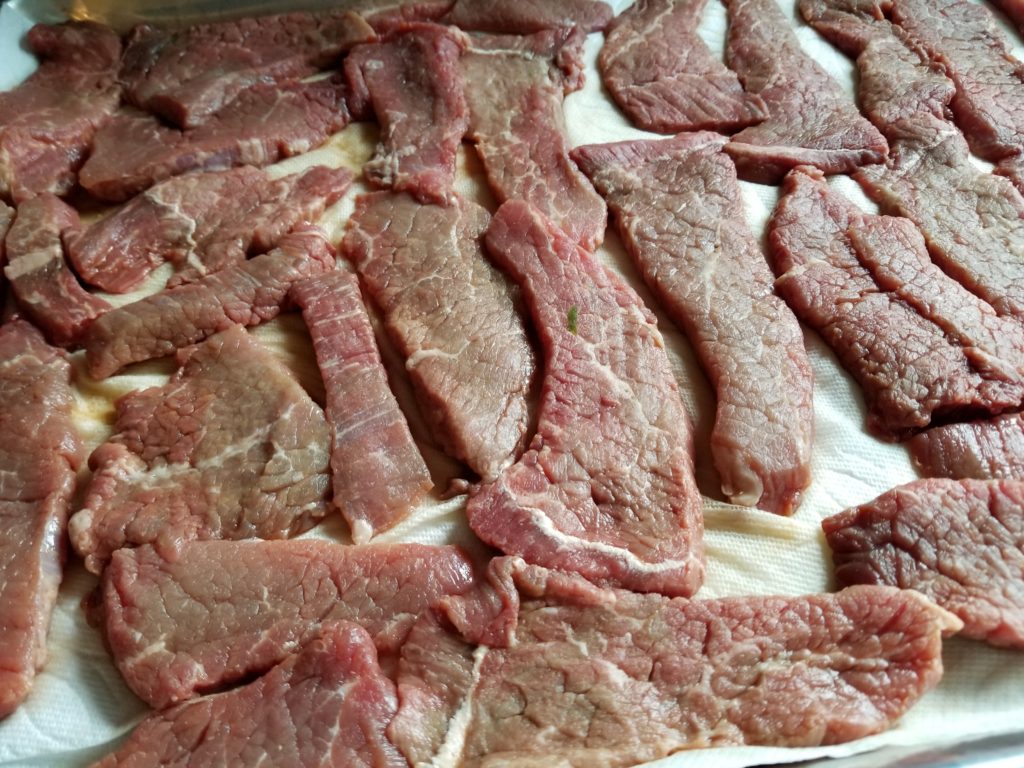
After marinading, drain and discard the marinade. You will want to dry the beef strips on paper towels to remove as much moisture as possible. Now fire up the Traeger on smoke setting. The temp should be 160 – 170 degrees for the entire cooking time.
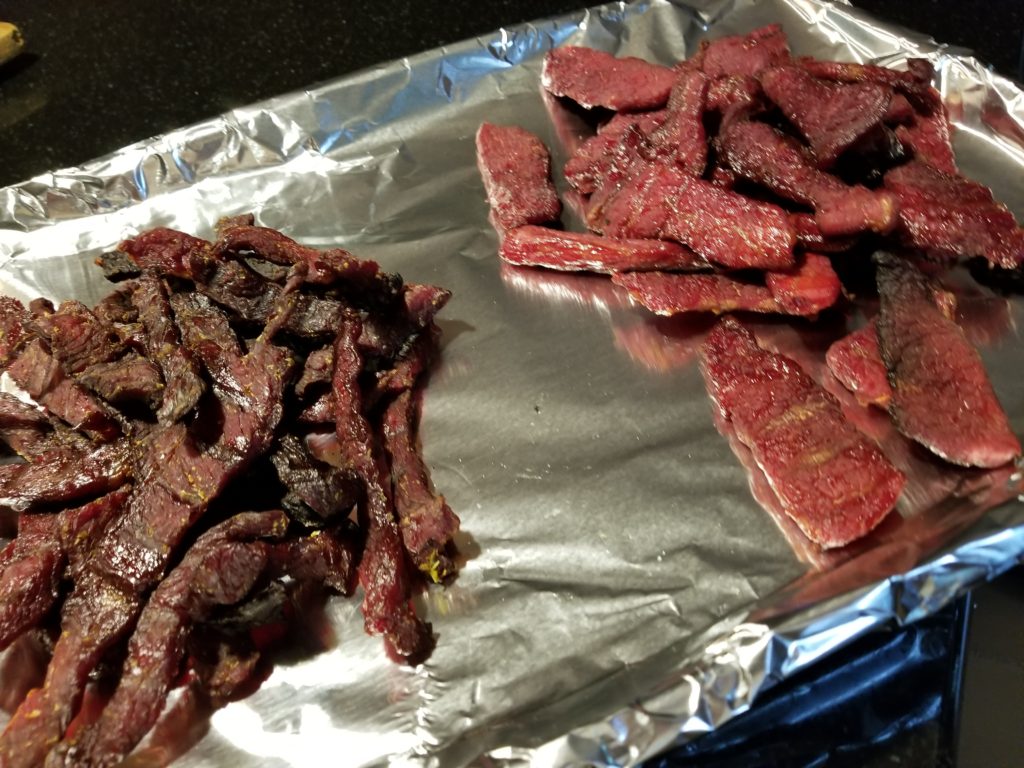
Drop directly on the grill grates and smoke for 4-5 hours. You want to pull the jerky off when the meat is still a bit pliable. Kris and I both liked the Pineapple and Chili the best. No need to stop at the store before our next road trip!! Cheers!

Jalapeno Beef Jerky

Ingredients

1-2 jalapeños, stemmed and seeded (or leave the seeds in for a hotter jerky)
1/4 cup lime juice
1/4 cup soy sauce – gluten free
4 tbsp brown sugar
1 cup mexican beer
1 tbsp morton tender quick® curing salt
2lbs sirloin tip

Directions

In a blender or small food processor, combine the jalapeño(s), lime juice, soy sauce, curing salt (if desired) and brown sugar and process until the jalapeño is finely chopped.

Pour into a mixing bowl, and stir in the beer.

With a sharp knife, slice the beef into 1/4-inch thick slices against the grain. (This is easier if the meat is partially frozen.) Trim any fat or connective tissue.

Put the beef slices in a large resealable plastic bag.

Pour the marinade mixture over the beef, and massage the bag so that all the slices get coated with the marinade. Seal the bag and refrigerate for several hours, or overnight.

When ready to cook, start the Traeger grill on Smoke with the lid open until the fire is established (4 to 5 minutes).

Remove the beef from the marinade and discard the marinade. Dry the beef slices between paper towels. Arrange the meat in a single layer directly on the grill grate.

Traeger’s Hot Jalapeno Jerky Smoke for 4 to 5 hours, or until the jerky is dry but still chewy and somewhat pliant when you bend a piece.

Transfer to a resealable plastic bag while the jerky’s still warm. Let the jerky rest for an hour at room temperature. Squeeze any air from the bag, and refrigerate the jerky. It will keep for several weeks in the fridge.

Pineapple and Chili Beef Jerky

Ingredients

1/2 cup Thai Kitchen Pineapple and Chili sauce
1/4 cup lime juice
1/4 cup soy sauce – gluten free
4 tbsp brown sugar
1 cup mexican beer
1 tbsp morton tender quick® curing salt
2lbs bottom round

Directions

Mix all ingredients then follow same directions as above.

Posted in Grilling | Leave a comment

Peanut Butter Cake

Are you looking for an easy to make dessert that is super good?? Well look no further, this Peanut Butter Cake is it! As you know Kris and I like to watch The Kitchen on the Food Network and this was on the other week. Recipe courtesy of  Molly Yeh, who also has a show on the network – Girl Meets Farm. I was able to toss this together after work as we had an old friend in town. She and the girls, a few neighbors all came over for cocktails and cake. It was a wonderful evening.Not to much to gather to start the process. Another reason I liked this recipe is it only calls for one cup of flour. Being gluten free I always sub out the regular flour with GF which can sometimes make desserts a little dense if there is a lot of flour in them. One cup = no worries. Nobody will be able to tell the difference! (I only had a 9 x 9 pan so my cake came out a little flatter)After baking, let cool completely before adding the toppings. I used homemade whip cream and fresh berries. So good! I think next time I may swirl some jam in the batter to make a peanut butter and jelly cake……Cheers!

Ingredients
1 cup sugar
1 cup gluten free flour
3/4 teaspoon kosher salt
3/4 teaspoon baking powder
3/4 teaspoon baking soda
1 large egg
1 teaspoon vanilla extract
1/2 cup buttermilk
1/4 cup flavorless oil
6 tablespoons water
1/2 cup creamy unsalted, unsweetened peanut butter
Powdered sugar, whipped cream or yogurt, and/or fresh berries, for serving

Directions
Preheat the oven to 350 degrees F. Grease an 8-by-8-inch baking dish and line the bottom with parchment.

In a large bowl, whisk together the sugar, flour, salt, baking powder, and baking soda. In a medium bowl or large measuring cup, whisk together the egg, vanilla, buttermilk, oil, water, and peanut butter. Add the wet ingredients to the dry ingredients and stir to combine. Pour into the baking dish.

Bake until a toothpick inserted into the center comes out clean. Begin checking for doneness at 30 minutes.

Cool in the pan for 10 minutes. Remove to a rack to cool completely, or serve while it’s still warm. Serve plain or with desired toppings.

“Molly on the Range: Recipes and Stories from An Unlikely Life on a Farm” by Molly Yeh © Rodale Books 2016. Provided courtesy of Molly Yeh. All rights reserved.

Posted in Baking | Leave a comment

Grilled Half Chicken

Chicken is always good on the Traeger and now I have found a new favorite way to grill it. Half Chickens! If you cannot find half chickens at the store just buy whole ones and cut them in two. Easy to do if you have a good pair of Kitchen Shears. Grilling this way seems to keeps the chicken juicy with tons of flavor.

You place the half chickens skin side up on the grates and cook at 325 degrees until for 1-1 1/2 hours. Once the internal temp hits 165 you are good to go.I found an excellent ‘Rotisserie Rub’ to use on the chicken. Tastes like the ones you get in the store! Toss it on liberally and let chicken sit for about 15 minutes before tossing on the grill. Always make extra as the leftover chicken is perfect for chicken salad!!

Cheers!

Posted in Grilling | Leave a comment

Peach Cobbler – Traeger Style

What to do when you have a bag of fresh Georgia peaches? May cobbler on the Traeger, of course! I got the peaches at the farmers market and thought this would be a good way to use them. The Traeger adds a little smoke flavor for a unique taste.Be sure to use a cast iron pan – this adds to the flavor and cooks evenly on the grill. This is a great way to cook a dessert in the summer. No need to crank up the oven and heat up your house on a hot summer day. After 35-45 minutes at 350 degrees you will have a dessert to be proud of!! This is a great finish to a meal of BBQ chicken, Cheers!

INGREDIENTS

2 TBSP UNSALTED BUTTER, MELTED
3 LBS PEACHES, SLICED
1/4 CUP TRAEGER SMOKED SIMPLE SYRUP
2/3 CUP FLOUR
3/4 TSP BAKING POWDER
PINCH CINNAMON
PINCH SALT
1/2 CUP UNSALTED BUTTER, CUT INTO SMALL CUBES
1/2 CUP WHITE SUGAR
1 EGG
1/2 TSP VANILLA
1 TBSP RAW SUGAR

Directions

When ready to cook, start Traeger according to grill instructions. Set the temperature to 350 degrees F and preheat, lid closed, for 10 to 15 minutes.

Coat the inside of a cast iron pan with 2 Tbsp melted butter.

In a medium bowl, toss peaches with Smoked Simple Syrup and place in the prepared cast iron pan.

In a small bowl mix together flour, baking powder, cinnamon and salt; set aside. In a separate bowl, cream the butter and 1/2 cup sugar. Add egg and vanilla extract.

Gradually fold in the flour mixture. Spoon batter on top of peaches and sprinkle the top with raw sugar.

Place the cast iron in the grill and bake for approximately 35 to 45 minutes.

Posted in Baking, Grilling | Leave a comment

Superhero Muffins

We are back! It has been awhile since out last post (darn work) but I needed to pass this recipe on. While we were visiting friends in Miami, Beth had these muffins for us. She got the recipe here – Superhero-muffins – from the RunFastEatSlow blog. Great site for some healthy recipes. These muffins are packed with goodness and soooo tasty!Let’s get cooking! I always like to get all the ingredients before I start mixing things up. First up is mixing the dry ingredients together. Toss them in a large bowl and mix away.Toss the wet ingredients in another bowl and mix well. Now add the wet to the dry and stir just until incorporated. Put the mixed batter in muffin lined cups. I use my ice cream scoop for this. It is the perfect size to fill the cups.

Bake in a preheated 350 degree oven for 25-35 minutes. Mine took 30 minutes. The muffins will be done when a toothpick comes out clean. Cheers!

Ingredients

2 cups almond meal
1 cup old-fashioned rolled oats (use gluten-free if sensitive)
1/2 cup chopped walnuts
1/2 cup currants or raisins, optional
2 teaspoons ground cinnamon
1/2 teaspoon ground nutmeg
1 teaspoon baking soda
1/2 teaspoon fine sea salt
3 eggs, beaten
1 cup grated zucchini (about 1 zucchini)
1 cup grated carrot (about 2 carrots)
6 tablespoons unsalted butter, melted
1/2 cup Grade B maple syrup
1 teaspoon vanilla
paper muffin cups

Directions

Arrange a rack in the center of the oven and preheat the oven to 350°F. Line a 12-cup standard muffin tin with paper muffin cups.

In a large bowl, combine the almond meal, oats, walnuts, currants or raisins, if using, cinnamon, nutmeg, baking soda, and salt.

In a separate bowl, mix together the eggs, zucchini, carrot, butter, maple syrup, and vanilla.

Add the wet ingredients to the dry ingredients, mixing until just combined.

Spoon the batter into the muffin cups filling each to the brim. Bake until the muffins are nicely browned on top and a toothpick inserted in the center of a muffin comes out clean, about 25 to 35 minutes.

Posted in Baking | Leave a comment

Moroccan chicken in chraime sauce with sweet potato mash

I am sure you have all heard about meal delivery services. Well Kris and I decided to give it a try. With work and life being extremely busy we thought it would be a great experiment. I researched a few online and we decided to go with Sun Basket. One of the main reason was the different types of diets they support. Gluten free, Paleo, Vegan just to name a few. (we went with the Paleo option). We got our first basket last week and this was meal number one. The directions said it would take 30-40 minutes and that was spot on.

Fist step is to empty the bag and check all the ingredients. It is pretty awesome to have just the stuff you need. Everything looked fresh and tasty!I read through the instructions a couple times to be sure I had a handle on what is expected. I started chopping things up and was ready to cook.This was really a pretty easy recipe to follow. The sweet potato mash was just a matter of boiling the potatoes and mashing them when soft. The chicken and sauce was straight forward as well. The only thing I found was the sauce did not thicken as much as I would have liked. Next time I will add less water.

Once all the cooking was done it was time to plate up. Add the mashed potatoes to a plate and top with chicken and sauce. This was excellent! An amazing amount of flavor in a short time. So far so good! We are looking forward to the next meal.

Here is a photo from the Sun Basket cook book. Compare to mine above and they came out quite similar:)

Cheers!

Posted in Main Dishes | Leave a comment

Beef Enchiladas

Kris and I were in Fort Dodge a couple weeks ago and had some beef enchiladas from Tres Amigos restaurant and they were mighty good. I was craving them here at home so made a batch of my own! Not too hard to make and so good! First I made the filling. Browned a pound of ground beef and added some spices. I used chili powder, onion powder, cumin, salt and pepper. This sounded like the right blend for enchiladas. Once browned, put in a bowl to cool while making some tortillas.Time to gather up the tools! I am getting pretty good at making tortillas and can throw a batch together in about 15 minutes.Mix the masa with warm water and salt. Knead this for a couple minutes until a nice dough forms.Now it is time to press them out. Lay half a sandwich baggie on the press, add some dough, top with the other baggie half and smash!This press makes perfect sized tortillas for the enchiladas. Repeat until you have used up the dough. I have found that 1 cup of masa and 3/4 cup of water makes 6 nice tortillas.Place the tortillas on a HOT skillet and cook for 1-2 minutes per side. As the pan gathers more heat, 1 minute per side is enough. The tortillas are done once you see some charring. Place on a towel and cover while you make the rest of them.Time to fill them up. Place some of the cooled beef on the tortilla and wrap up tightly. I secure them with a toothpick to keep them rolled. Place in a baking dish. Line’em up in the baking dish. You can see the toothpicks keep them from unraveling and also helps keep the filling inside.Top with enchilada sauce of your choice. I used red sauce for these but am sure green would be just as good.Bake at 350 degrees until the cheese is melted. Remove the toothpicks, toss on a plate and you are ready to eat. Top with sour cream if you like. That is it! Now you have some homemade enchiladas that are as good as any restaurant!

Cheers!

Posted in Main Dishes | Leave a comment

Grilled Flank Steak and Cabbage

So it finally got above 10 degrees so that means it is time to grill! I picked up a flank steak and thought some grilled/braised cabbage would be a nice accompaniment. Plus these can both be done on the grill for an easy dinner.Cut the cabbage in to eights and place in a foil pan. Spread butter on the cut sides then season with salt and pepper. Cover tightly with foil and it is ready for the grill. You will want to grill at a high heat. With the Traeger that means 400-450 degrees.

For the flank steak, drizzle with olive oil and season both sides with salt and pepper. Grill both for about 20 minutes.

Let the steak rest for about 10 minutes before slicing. I sauteed a few mushrooms to add to the steak and had a little peppercorn ranch for the cabbage.

I love grilling! Cheers!

Posted in Grilling | Leave a comment